
Clyde Puffer (Mountfleet Models “Highlander”)
By Richard Harris
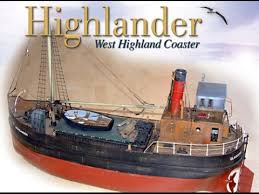
Following the eventual completion of an Eldergarth Tug a new long term project was required. After looking at different options it was decided to build a Clyde Puffer. The Mountfleet Models Highlander looked ideal and in January 2016 a large box containing the kit arrived. Before construction started it was decided to use an MFA Torpedo 800 motor directly driving the propeller. This was purchased together with coupling ready to be installed when required.
After reading the building instructions several times a start was made following in general the building sequence outlined. Most of the construction was fairly straight forward but a few problems were encountered that had to be overcome.
The first was very early on in the build. The main deck frame measurements showed that it was not going to fit, the frame being some 20mm wider than the hull. Fitting the frame relied on some flexibility in the hull to accommodate the width. After contacting Mountfleet it appeared I was not the only one with the problem. The hull thickness had been increased giving the hull more strength but as a consequence it was less flexible. In the end the frame was made 10mm narrower which did just allow it to squeeze into the hull.
The narrower deck highlighted another problem. The kit included printed ply panels to simulate the fore and aft decking. These now did not really fit. It was decided to take a more time-consuming route and hand plank these areas. This was done by firstly cutting the required deck shape out of 0.5mm wood sheet to create a base. Using the original printed sheets as a guide lengths of 1x7mm strips were cut to simulate the planking. Before gluing to the base black cartridge paper was glued to the edge of the planks to simulate chalking. The curved edges were cut from 1mm sheet and the fitted in the same way to the base. The planks were then scraped using a sharp bladed to remove excess cartridge paper. Note sanding caused paper dust that worked it’s way into the grain of the wood. A thin permanent marker pen was then used to simulate the nails. Finally, the planking was glued in place on the decking.
It came to the time for painting the hull. Normally car paint spray would be used but it was decided to try out a newly acquired airbrush using Vallejo Premium RC, a tough Acrylic Polyurethane paint. The hull had been previously washed and prepared, then given several light coats of the recommended RC primer. After letting it dry out for a few days the top coats were then applied. However, after carefully removing the masking tape a small amount of paint started to peel off. Using some tape to test other areas showed up a major problem. The priming coat in a lot of places had not adhered hull. After much deliberation the only way forward was to remove the loose paint and start again! Tests were run on an area of the hull and it was found the best option was to brush on normal Vallejo grey primer and then spray the top coats as before. The hull was left for several weeks to thoroughly dry out before several coats of Acrylic Polyurethane Satin varnish were applied.
In July 2019 and renamed “Jura Rose” (after a favourite tipple) she was ready for her first outing on the lake. There was still plenty of detailing work left to do but functionally she was ready for the water. Sea trials went well with only a slight ESC problem with the old one that had been fitted and the addition of yet more ballast. The ESC was replaced later with a newer version which gave better control and quieter operation.
Since then details have been steadily added as seen in the photos. These include fitting out the wheelhouse, detailing the main hatch, fitting working lights, completing the rigging and painting the crew. The main job left is the construction of the ships boat.
Hopefully it won’t be too long before sailing resumes and she can be seen on the lake.
Richard